www.wimb.net - SEBasic to HTML
There are two choices: make a whole HTML page with a header and footer, or convert only the MCPI Basic program to HTML code which can then be inserted in an existing HTML page. The program has some built-in tools for formatting the MCPI task like putting all the comment at a fixed position. Also you can place automatically a download button to "get the task". All these option are selectable or can be switched on or off.
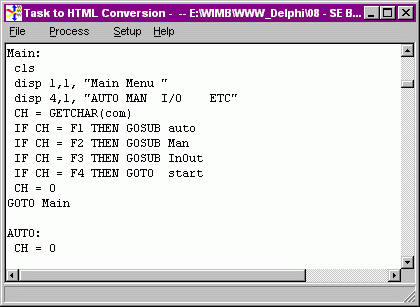
Basic Listing
This screen show the "raw" input from the MCPI task, note that there is no formatting at all.
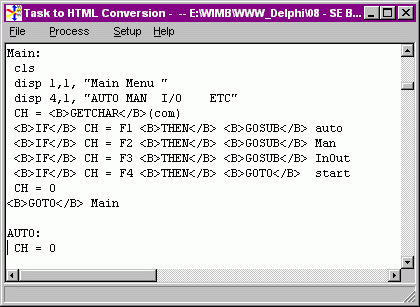
HTML Listing
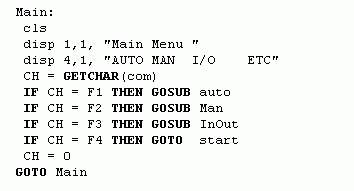
This is the formatted and HTML coded output. Below also the HTML output.
The Menu
File ¦ New This clears the text window.
File ¦ Open task You can open a MCPI task, with the extension TSK. The text comes in the window. You may do some last minute editing. Also the result of the Task Formatting can be watched.
File ¦ Task save When you did some modifications on the task then you may save it via this menu item.
File ¦ HTML save Once when the conversion is done you can save the generated HTML code with this menu item.
Process ¦ Format task This starts formatting the MCPI task. For example you can place the remarks at a fixed position on the right of the page.
Process ¦ Convert to HTML Here the task is converted to HTML. It does not make a whole page but only HTML code with the previous formatting inside.
Process ¦ Convert to RTF With this menu option you can convert a Task to RTF. When done the RTF file opens in a new window, there it can be saved to file or copied to the clipboard. The RTF file can be processed by Microsoft Word or any other word processor.
Process ¦ Make whole page Here the task is converted to an HTML page, complete with background, Meta tags etc.
Process ¦ Automatic (O,F,P,S) When once a page is made and more have to be done with the same settings, then it's easier to use this command. It Opens a task, does the Formatting, then makes an HTML Page and it Saves the page with the same name as the task, but with an HTML extension.
When the menu the Process ¦ Make whole page option is selected, then a complete HTML page is made from the MCPI Basic program. For the layout of the page there are several options.
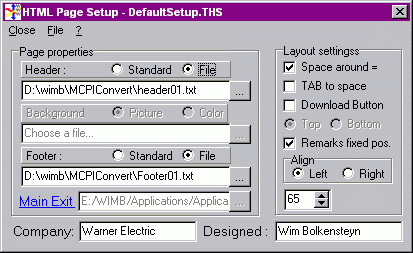
HTML Setup
Here the HTML Page Properties can be set.
Header - This is the top of the HTML page, everything above the MCPI program listing. Here you can select Standard or File. With Standard the page will be made with the data coming from the Task to HTML Program itself. If some more is needed, it can be put in a file and then selected via File. Now you can put your company logo at the top of the HTML page. Note that the header file must end with the </HEADER > and the <BODY > tag, followed by the background selection.
Background - The Background is enabled when the Standard Header is selected. With File selected, the background must be set in the file. When the background is enabled there is a choice between Picture and Color. The Picture is normally in GIF format and the Color can be chosen from a popup ColorBox.
Footer - The Footer is the bottom of the file. As with the header, here is a choice between Standard and File. The standard comes from the program and contains a "Main Exit" and a "Back" link. The File you have to make yourself. It may contain a menu bar to navigate on the site. The Footer file must also contain the </BODY > tag.
Main Exit - When the standard footer is used then with this selection box a HTML File can be selected to go to as "Main Exit" from the current page. When a Footer file is selected then the Main Exit has no function and is disabled.
Some formatting of the MCPI Basic program can be done with this program. In many cases this will be faster then using the MCPI editor and changing line by line. When a Task is modified then it can also be saved under the same - or another name.
Space around = - With this option enabled spaces will be placed around all equal signs and arithmetic function sings. For example: A=B becomes A = B, which makes a program more readable.
Tab to space - In some cases it is better to remove tabs and to replace with spaces.
Download Button - It is useful to place a Download Button at the Top or at the Bottom of the MCPI Program listing. At this moment the default download name has the same extension as the task (TSK), so the download does not always go automatically. The browser may launch the MCPI program. Use the left mouse button to force a download, or ZIP the task and change the default extension near the download button to ZIP.
Remarks at Fixed Position -
With this option all the remarks can be placed to start at the same column. Remarks at the start of a line, without to be preceded by a MCPI basic statement, are kept at the same place.
The remark position can be changed with a SpinEdit.
The company name and the name of the person who made the page can be put in the HTML page. If Standard is selected then these two items are placed in Meta tags and as comment. If File is selected then it is inserted only as comment.
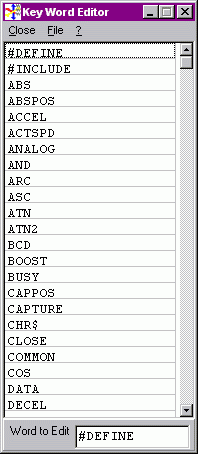
The Keyword Editor
The Keyword Editor is to manage the file KEYWORDS.TXT . This file is automatically opened when the program starts. In the main program the keywords are used to determine which word has to be converted to bold. This should be the same words as are put in bold with the MCPI editor, when the option "key word checking on" is enabled.
Editing Existing words can be edited in the edit box at the bottom of the form. Select the word to be edited, click with the left mouse button in the edit box, modify the word and press the enter key. Now the word is stored in the list. To use it a next time it must be saved to the file "KEYWORDS.TXT".
New words Select File ¦ add record A new, empty record is added to the bottom of the list of keywords. Go to the bottom of the list, click with the left mouse button on the empty place and type the new word in the edit box at the bottom of the form. To add the word to the list press the enter key.
With File ¦ Keywords sort, the new word will be placed on its correct position. Now save the file to have the new word also available when the program starts the next time.
Delete words Select the word to be deleted. Click in the edit box at the bottom of the form and remove the whole word with backspace or the delete key. Then press the enter key. Then with keywords sort, the empty place will be removed from the list. Now the list can be saved.
Updated 2007 Oct. 09


